
Upcycled wool sweaters into bunny cushions
It definately feels like spring now, so I thought I’d make some fun cushions to celebrate the new season.
In my large stash of old woolen sweaters I had a few lovely soft pink cashmere ones, perfect to turn into a cute bunny cushion. These cushions are really quite simple to make, they also add a bit of spring fun to the sofa. Not sure my friends cat is too impressed though !

What you need to make your bunny cushions

How to Make Your Bunny Cushion
One sweater will be enough per cushion.
- 1. Lay your sweater out flat and place your paper on top to make a template. Draw out a pattern on the paper that will allow you to make as big a cushion as possible. Whilst the paper is pinned to the sweater draw the face and feet on to paper.
- 2. Cut out your cushion shape from the sweater, keeping the sleeves to one side. Cut out a bunny shaped ear from each sleeve.
- 3.Cut out the felt for the face using the paper template.

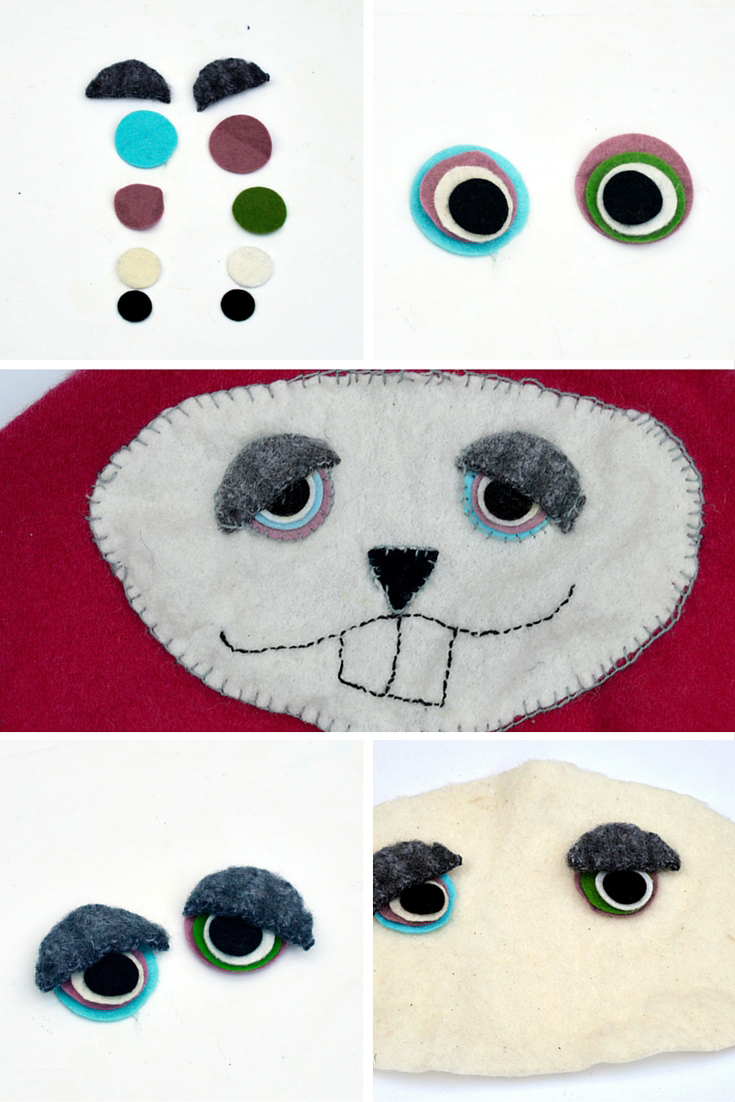
Before sewing up the sides of the bunny body and ears you need to make the face.
- 4. For the eyes cut out 4 circles decreasing in size for each eye in a variety of colours. Cut out 2 felt eyelids these are half circles slightly bigger than your largest circle. Using fabric glue stick the circles on top of one another in size order with eyelid on top. Then sew these onto your felt facepiece.
Use any stitch you prefer. I used a blanket stitch whereas my friend Wendy just used a random stitch. It is nice to use an embroidery thread in a contrasting colour and make the stitch a feature.
- 5. Cut a small triangle of felt for the nose, and the embroider the mouth and teeth.
- 6. When the face is finished, stitch this to the front of your sweater using your prefered stitch.
- 7. Turn your sweater body and ears inside out and stitch up leaving a small hole to stuff it. Turn them the right sides out and stuff with fiber filling and sew the holes shut. Sew the ears to the body.


- 8. To give your bunny cushion more character, you can add some embellishments. Such as inners in a contrasting fabric for the ears & feet pads. Felt flowers and hearts are great for hiding any holes in your jumper and some extra interest.
Don’t forget to make a big pompom for the tail ! Click here to see a quick and clever way to make pom poms

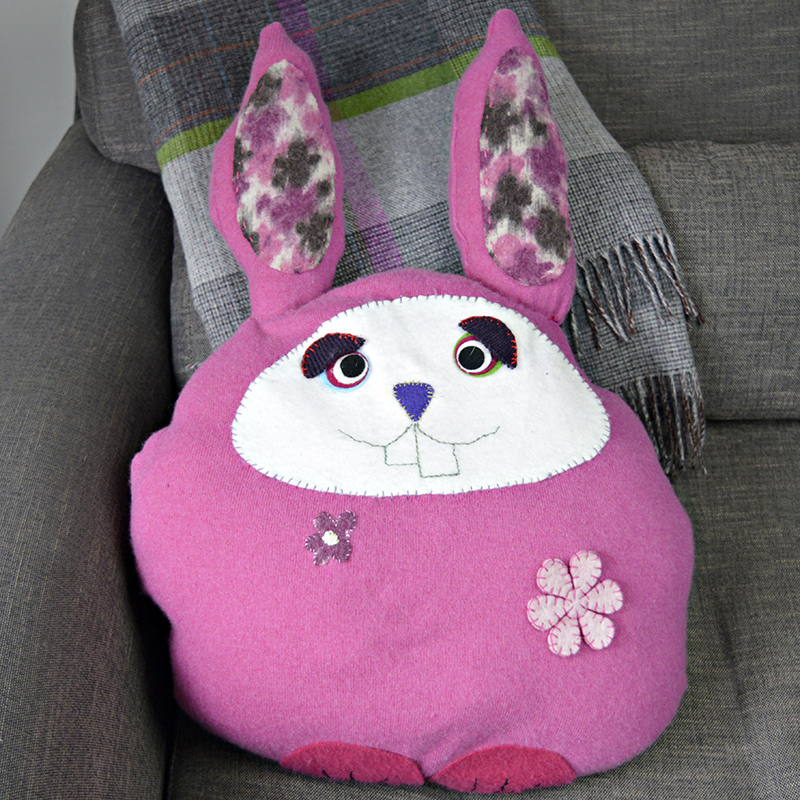

Hopefully the cat will eventually grow to love the bunny cushion ! Are there any furnishings in your house which your pets love or hate ?
The post Upcycled Sweater Bunny Cushion appeared first on Pillar Box Blue.